In this article, we will create a basic discord bot using the Discord.py Library in Python to outline the process and give you a minimum functional unit that we will use to build upon. I will skip through the boring bits since I assume you already know what a Discord bot is. Let's goooo.
Creating A Discord Bot on the platform.
First, we need to create a bot on the Discord Developer Portal. When you log on to the portal, you will get an interface like this.

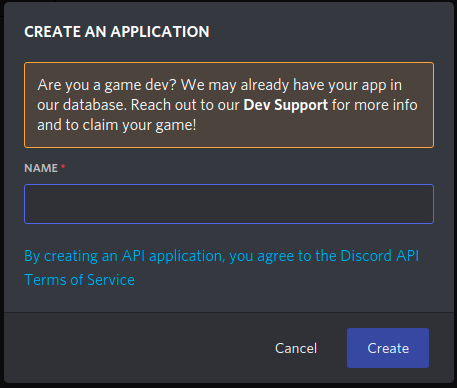
Click on New Application. It will ask you to name your application, like this:
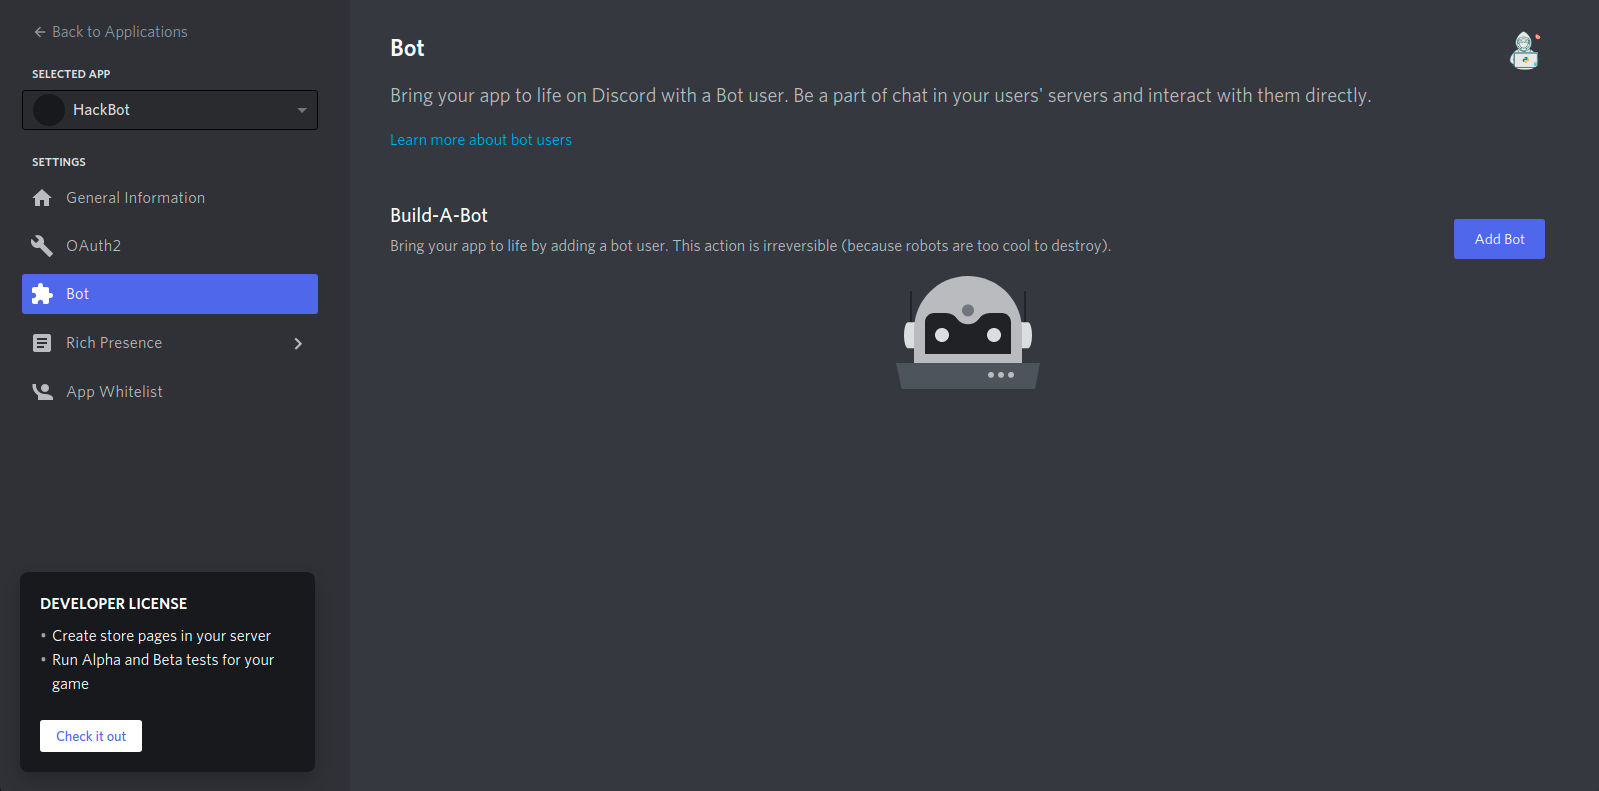
After you click on Create. It will take you to a page like the one below. Click On Bot to access a page like the one below. Click on Add Bot.
Name your Bot and click on Copy below "Token" and save it somewhere safe. And scroll down.
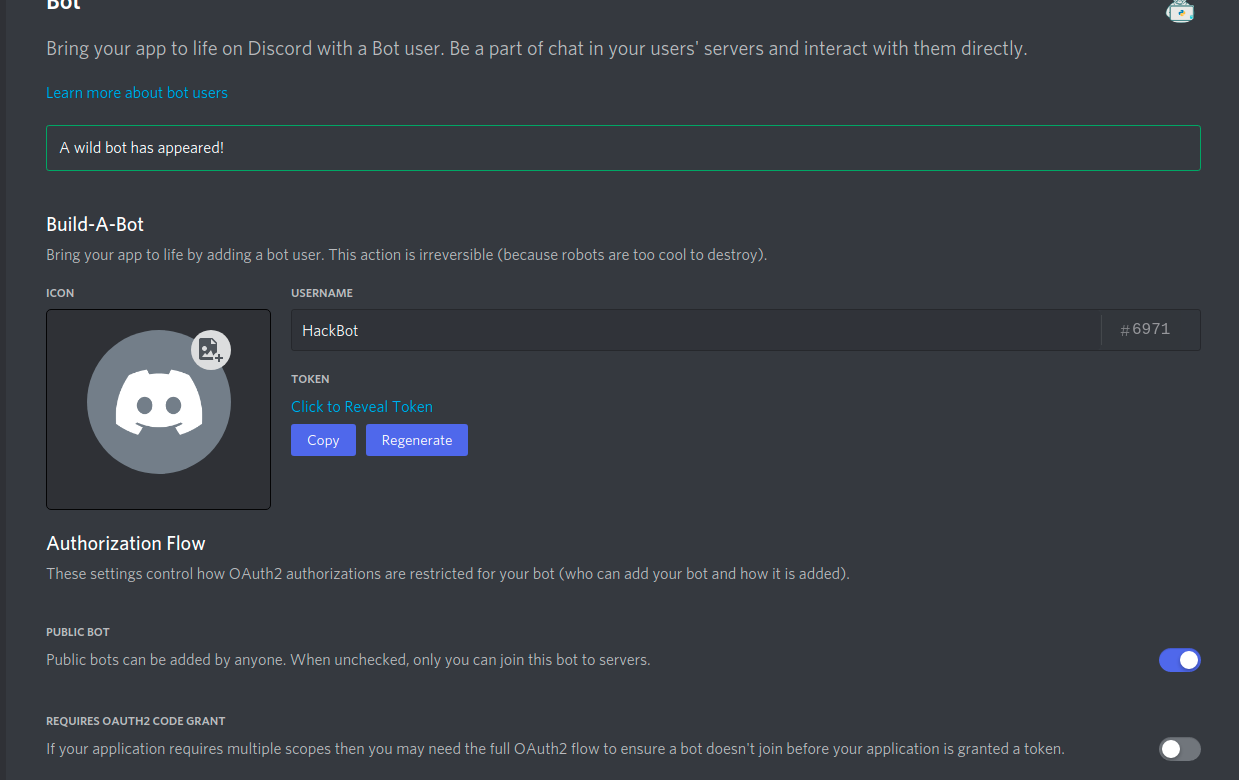
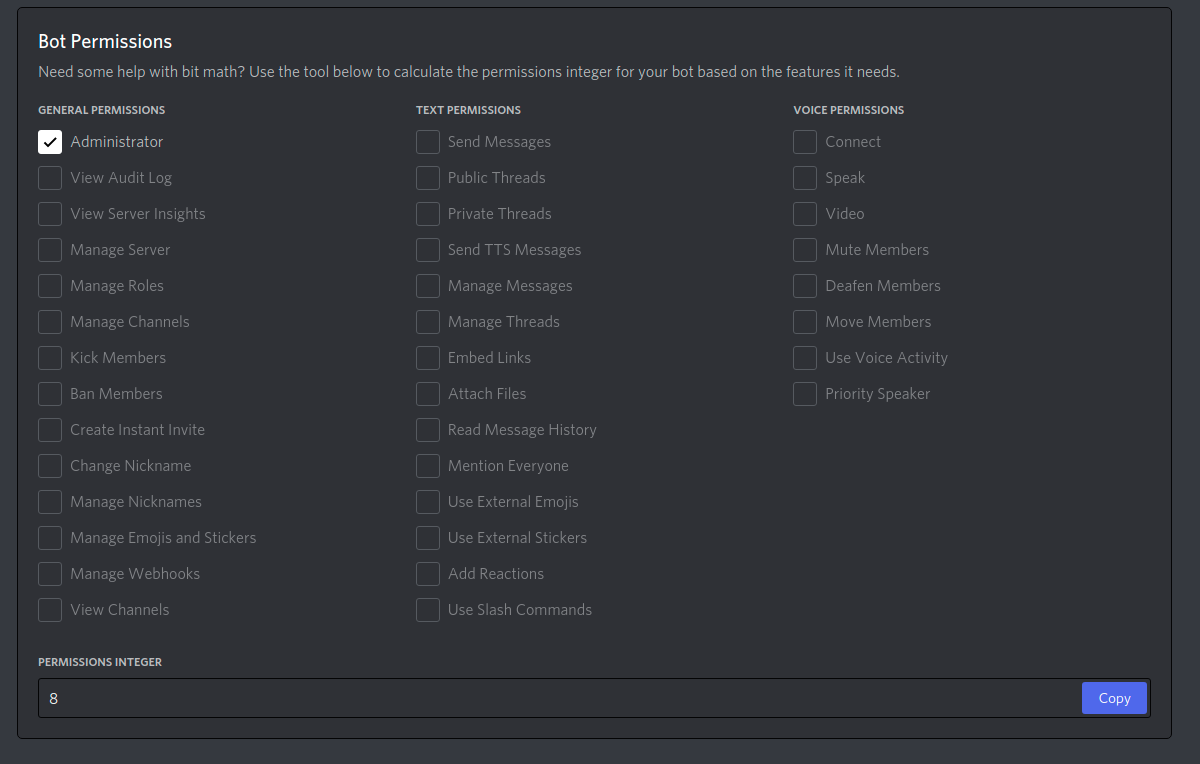
You should now come across to a Permissions section. Select all the permissions you need and note down the number given.
Use this link
https://discordapp.com/oauth2/authorize?client_id=<Client-id>&scope=bot&permissions=<Permission-integer>
replacing the Client-Id and Permission Integer. The client id will be available in the OAuth2 section of your App in the developer portal.
Installing the Packages.
First, we will use pip to install the discord.py package.
python3 -m pip install -U discord.py
Importing the packages.
Now, we will import the required packages.
import os
from discord.ext import commands
Initialising the Bot.
We can now initialise the bot with a command prefix.
bot = commands.Bot(command_prefix='$')
Set-Up our first command.
We shall now use the bot.command() decorator and an asynchronous function with one argument "ctx" to define a command with no arguments. We can use the await ctx.send("your ,sg here") to send a message.
@bot.command()
async def hello(ctx):
  await ctx.send("Hi!")
Running the Bot.
We should now run the bot with the bot token that we copied as the argument.
print("Bot is running.")
bot.run(Token)
The Output.
We can now see the output after running the bot.
